When managing several Varnish instance(s), keeping the configuration coherent between them can be hard. Monitoring and deploying configuration, restarting the instances in a synchronized fashion requires some knowledge. The Varnish Administration Console (VAC) , provides a full API that helps leveraging once difficult tasks.
This post is part of a series of articles. We hope that after this, you can use where we show you how you can use the VAC API to automate you Varnish tasks and improve your workflow.
All the examples are using httpie
We start off by listing the available Varnish instances that are registered in the VAC. This registration is automatic by the Varnish Agent configuration file. info
Listing all the caches registered in VAC
http --auth <user>:<pass> http://localhost:8080/api/v1/cache
The VAC is running in localhost in port 8080.
The output would be:
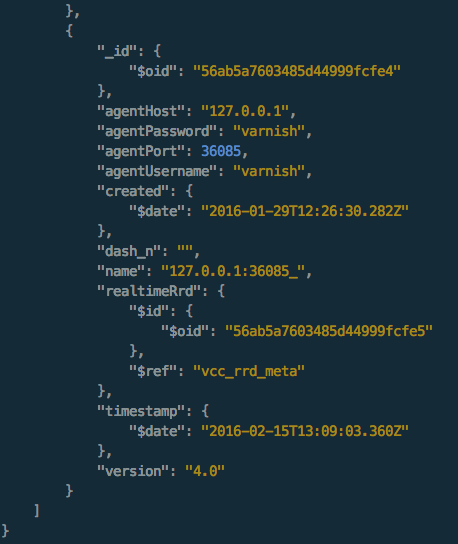
Among other information we for example check the version of Varnish the cache is running Varnish 4.0 in this case. The Varnish Administration Console can manage different versions of Varnish at the same time. The only condition here is that the caches with different versions must belong to different cache groups.
Also you can manage both Varnish Cache and Varnish Cache Plus instances at the same time.
We will explain a bit more about the groups further ahead.
Cache information
The information from the last command is not very helpful so let's get a bit more information from that specific Varnish instance.
Using the id from the previous output we issue the request to the endpoint /api/v1/cache/56ab5a7603485d44999fcfe4/summary
the output is:
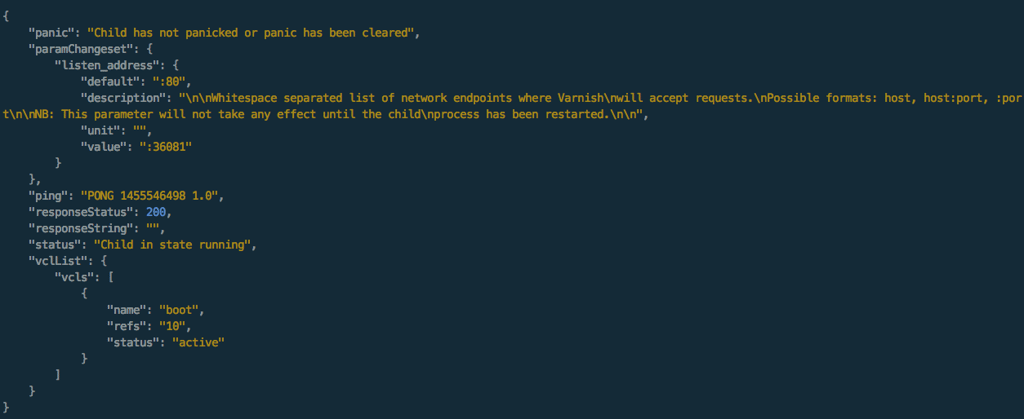
Here we get a bit more detail about this particular Varnish instance.
We can see if a panic has occurred, get details about its listening address, and also the list of the VCLs that the Varnish instance is running. At the moment a VCL is in the instance, and the name is boot.
There are some other operations you can do with the API regarding caches, but let's focus on the most relevant for now.
Getting Varnish counters
The VAC can get Varnish-specific counters through the API.
The VAC exposes the following counters by default:
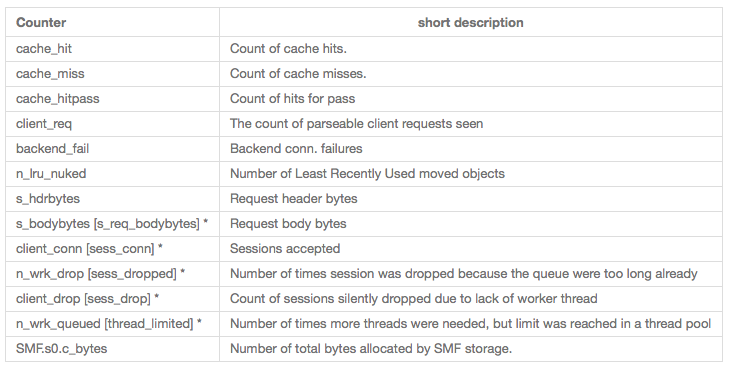
*For compatibility reasons the endpoint uses the v3 name of the counter. [v4 counter for reference in brackets]. More counters can be added in the VAC configuration.
Storing statistical information in the VAC is done using a Round Robin Database (RRD). The existing database will persist the information about the counters.
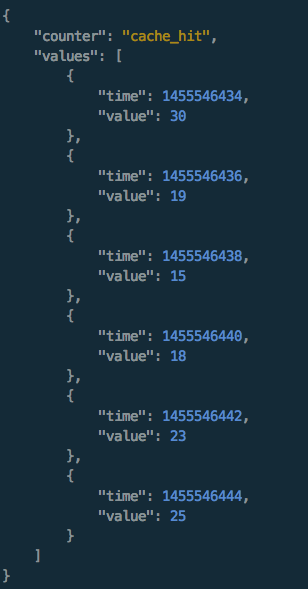
Let's look into the cache hits, with 5 samples of 2 seconds each or in other words last 10 seconds of time in 2 seconds data points.
Calling api/v1/cache/56ab5a7603485d44999fcfe4/stats/cache_hit/2/5/average
Which by definition is /api/v1/cache/{cache_id}/stats/{counter}/{resolution_per_sample}/{number_of_samples}/{consolfunc}
In {resolution_per_sample} we specify the interval of the data point we want. By default the VAC has 1, 2, 3, 5 seconds or 1 minute defined.
In {number_of_samples} the number of data samples we want to get of the {resolution_per_sample}. In this case we want to cover 10 seconds and the granularity is a 2 second data point. The output would be:
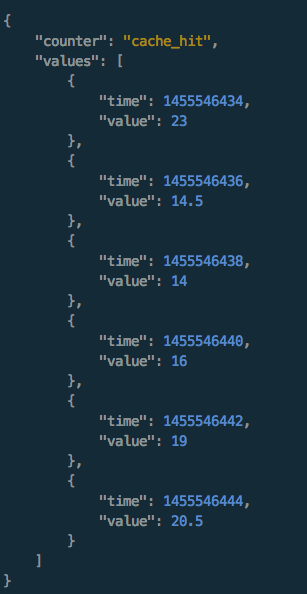
We are covering 10 seconds and the output is 6 values in order to cover for the 2 second step. If we issue the exact same command but with another {consolfunc}, like max, we get the max value and not the computed average between those points.
/api/v1/cache/56ab5a7603485d44999fcfe4/stats/cache_hit/2/5/max
In this case the output would be a little different:
Cache group(s)
Being the single point of control for all of your Varnish instances, the VAC introduces the concept of a group. With a group you can share configuration between your Varnish instance(s), keeping both VCL and your set of parameters consistent across Varnish instances. For this to happen you need to have in mind that a Varnish instance belongs only to one group at a given time. Also the group shouldn't have different versions of Varnish running in its instances.
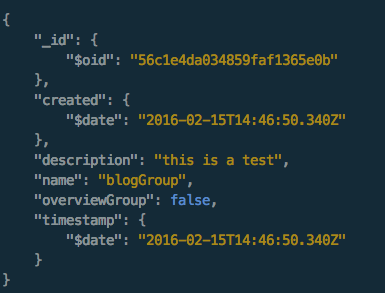
Let's create a new group, and then add a couple of caches to that group.
http --auth <user>:<pass> POST http://localhost:8080/api/v1/group name=blogGroup description="this is a test"
The POST body is:

Output:
Now that we have created a group, we can give Varnish instance(s) to the group. For that we use the following endpoint:
/api/v1/group/{group_id}/include/{node_id}
http --auth <user>:<pass> PUT http://localhost:8080/api/v1/group/56c1e4da034859faf1365e0b/include/56ab5a7603485d44999fcfe4
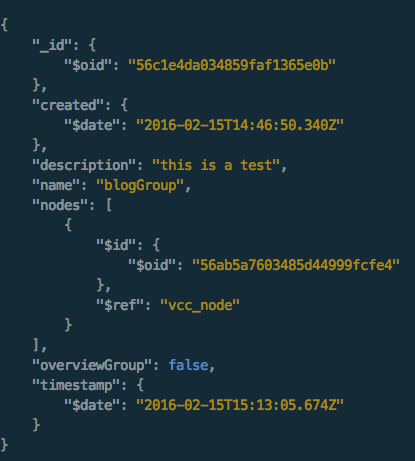
If you now get the information for that group we see the new Varnish node in the group detail:
http --auth <user>:<pass> http://localhost:8080/api/v1/group/56c1e4da034859faf1365e0b
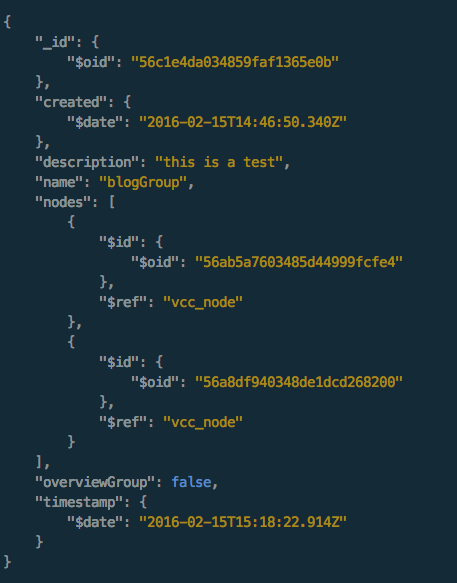
Let's now add another Varnish instance to the same group. Again, this cache needs to be only in one group at the time (VAC will make sure of that), and needs to also be running the same Varnish major version, in this case 4.x.
Adding a new cache we now get 2 Varnish nodes in the same group:
Deploying a VCL to a group of Varnish Instances
Now that things are starting to get interesting, let's deploy the same VCL to both Varnish instances. For that we need to create the VCL first. With the POST body
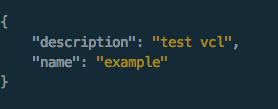
We issue a POST request:
http --auth <user>:<pass> POST http://localhost:8080/api/v1/vcl name=example description="test vcl"
Now that the VCL is created we need to add content to the VCL. The reason that we issue two different requests is that the VCL content is managed separately. This allows us to have a git like history system on a given VCL.
Let's add content to the created VCL.
Initially the VCL will only have a few lines:

Using
http --auth vac:vac POST http://localhost:8080/api/v1/vcl/56c1ed5b034859faf1365e0d/push content="vcl 4.0;"
We get the VCL detail including the head:true that means this is the tip of your "commits" in the VCL.
Every time you want to update the VCL you can use this method. Let's check the VCL history:
http --auth vac:vac http://localhost:8080/api/v1/vcl/56c1ed5b034859faf1365e0d/history
We can see two of the VCL commits:
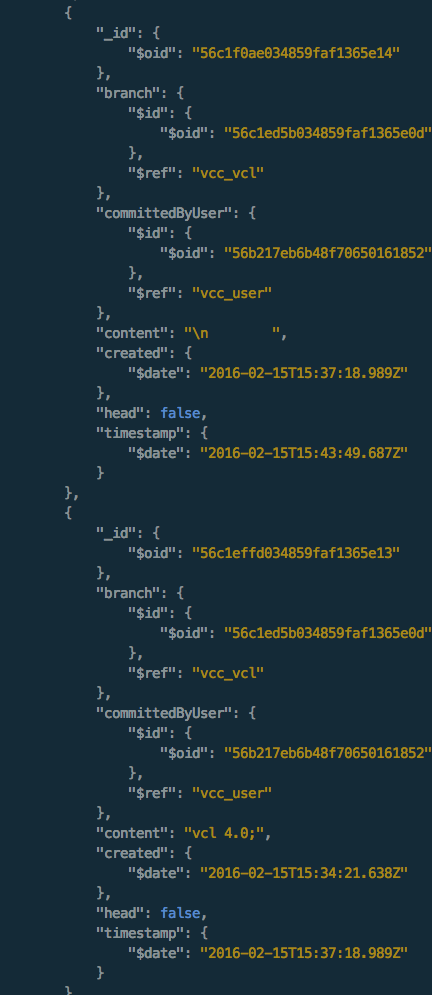
Notice that the branch is the same, so the "base" VCL is the same but the ID like in a commit ID, changes.
The /head endpoint will give you the current HEAD of the VCL so you get the latest.
At this point the VCL is only known to the VAC and we want to deploy it to our group of two Varnish instances. For that we use one single command.
Let's first check the summary in each of the caches in the group:
We can call the summary throughout the group:
http --auth vac:vac http://localhost:8080/api/v1/group/56c1e4da034859faf1365e0b/summary
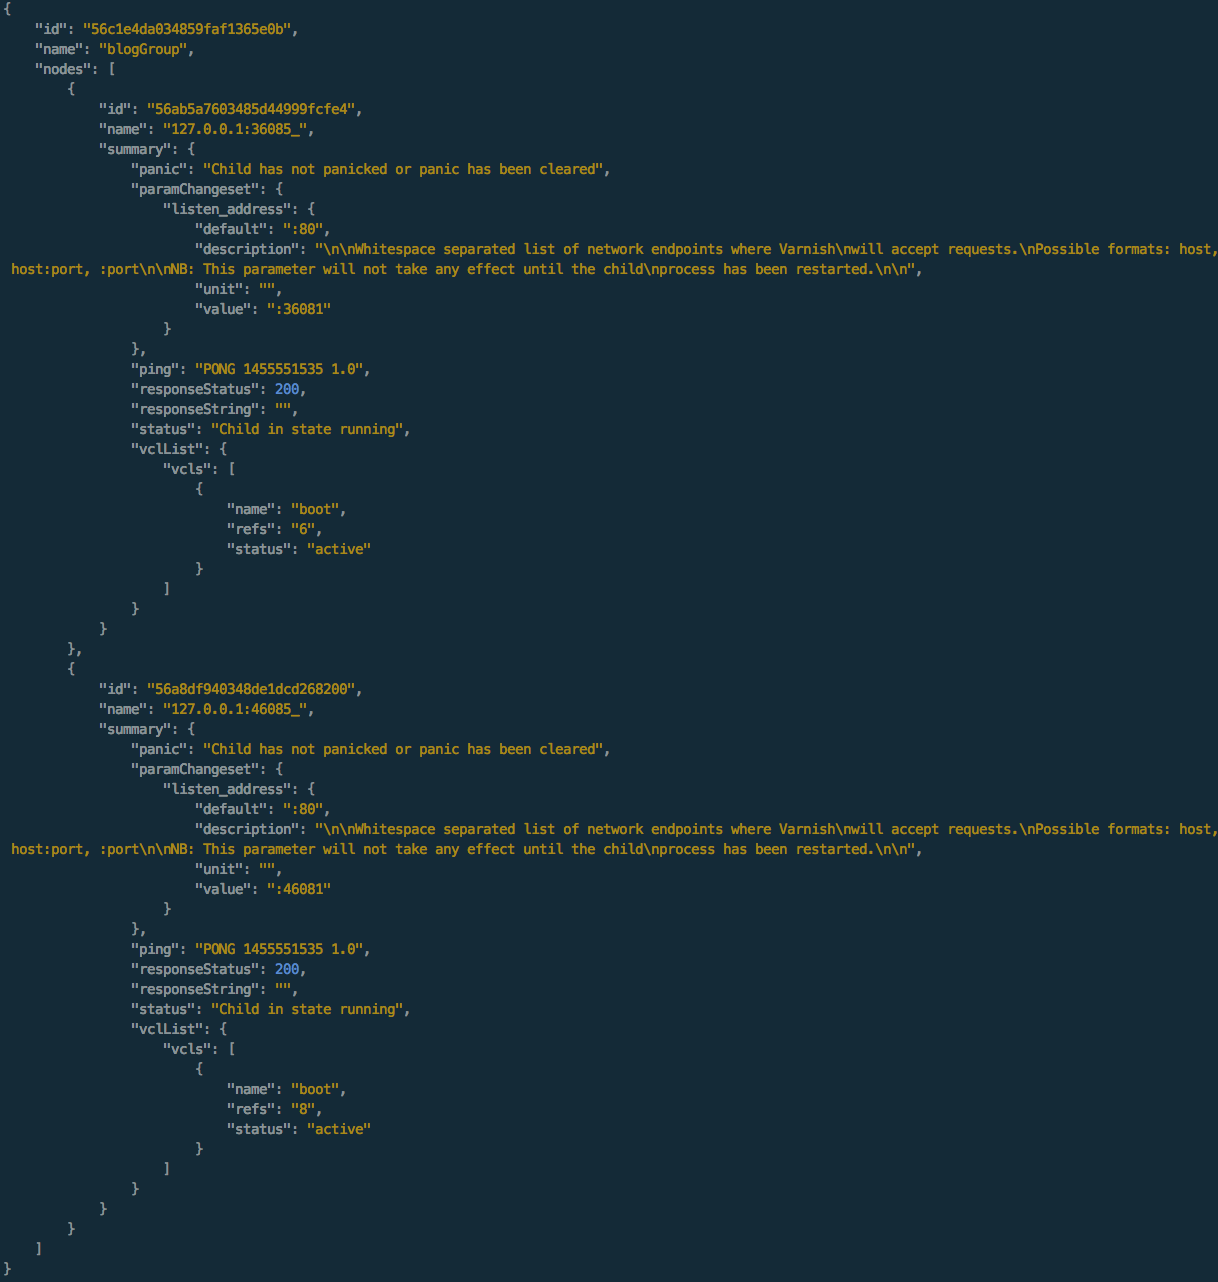
Now, let's deploy the VCL we've just created to the Varnish instances in the group:
http --auth vac:vac PUT http://localhost:8080/api/v1/group/56c1e4da034859faf1365e0b/vcl/56c1ed5b034859faf1365e0d/deploy
In this case the VCL is missing backend definition or directors so although the VCL is deployed the outputs show a message, note the HTTP 400 error.

Let's add correct content to our VCL:
{
    "content": "vcl 4.0;backend one {.host = \"localhost\";.port = \"36081\";}"
}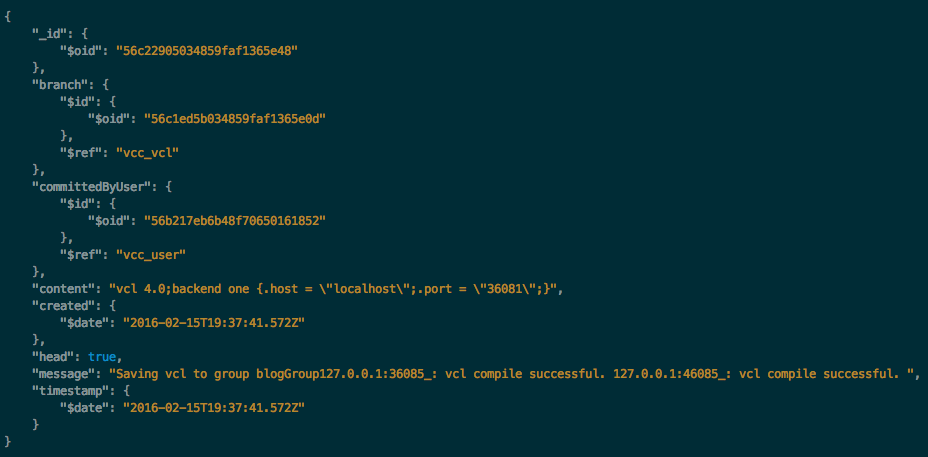
Let's look into the summary of the group:
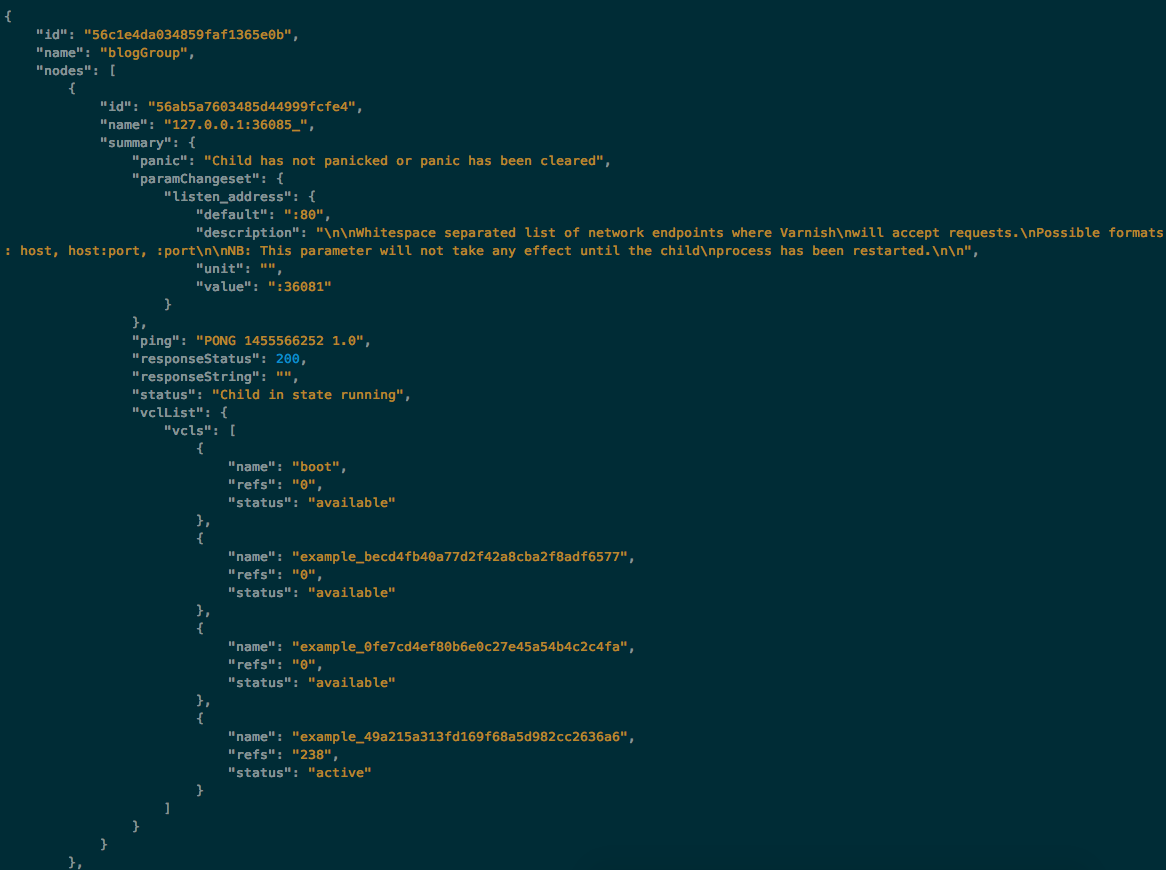
In the VCL group we can see several versions of the VCL example, but one of them active, which corresponds to the HEAD in the VAC.
You can do a lot more
The way you manage a set of parameters in Varnish is somehow similar to this, although in that case we don't keep a history, and only keep the current set, keeping it coherent between multiple instances.
Also, the groups also provide data endpoints, RRD based, like we've shown in the instances. This allows for combined data in a group.
Conclusion
With this post, the goal was to introduce a basic workflow for your Varnish instance(s). We explained the concept of a group, we briefly introduced the statistical approach of the data in the VAC and learned how to deploy and maintain diferrent versions of a VCL in the VAC.
What's Next...
In this blog post we've only covered some of the endpoints and functionality. In the next part, we will go step by step into how to do advanced configuration management with the VAC API and Git.
- Auto deploy VCL changes to a number of Varnish servers
- Version track VCL changes
- Rollback failed VCL changes
- Maintain and ensure the correct VCL is used even if Varnish child process restarts.
The Varnish Administration Console is part of the Varnish Plus offering. If you are interested in a trial contact us.
Photo (c) 1981 NASA Johnson used under Creative Commons license.


