We’re happy to announce the availability of the official Varnish Enterprise Helm Chart. Helm is a package manager and templating engine for deploying containers and applications on Kubernetes.
Helm Charts abstract most of the complexity of writing Kubernetes configurations. Instead they expose a number of configuration parameters that you can override by configuring them in a values.yaml file. In the end, Helm will parse these values into the templates and execute them as if they were regular Kubernetes configuration files.
This allows you to deploy a Varnish Enterprise setup with all the bells and whistles in mere seconds. It’s as simple as running the following helm install command:
helm install -f values.yaml varnish-enterprise varnish/varnish-enterprise
This command installs a Helm release called varnish-enterprise that uses the varnish/varnish-enterprise Helm Chart and applies the configurations defined in values.yaml to it.
Getting started
Getting started with the Varnish Enterprise Helm Chart requires that you have the following things in place:
- Helm running on your computer
- Access to the Kubernetes server you’re planning to deploy to
- A Varnish Enterprise license
As a reminder, Helm Chart is part of the Varnish Enterprise offering. This is not an open source solution, this is strictly for Varnish Software clients and requires a Varnish Enterprise license.
Obtaining access to the Helm Chart Repository and the Docker repository that holds the Varnish Enterprise Docker image, requires authorized access.
The install page on https://docs.varnish-software.com/varnish-helm/varnish-enterprise/installation/ explains how to get that set up, as you can see in the screenshot below:
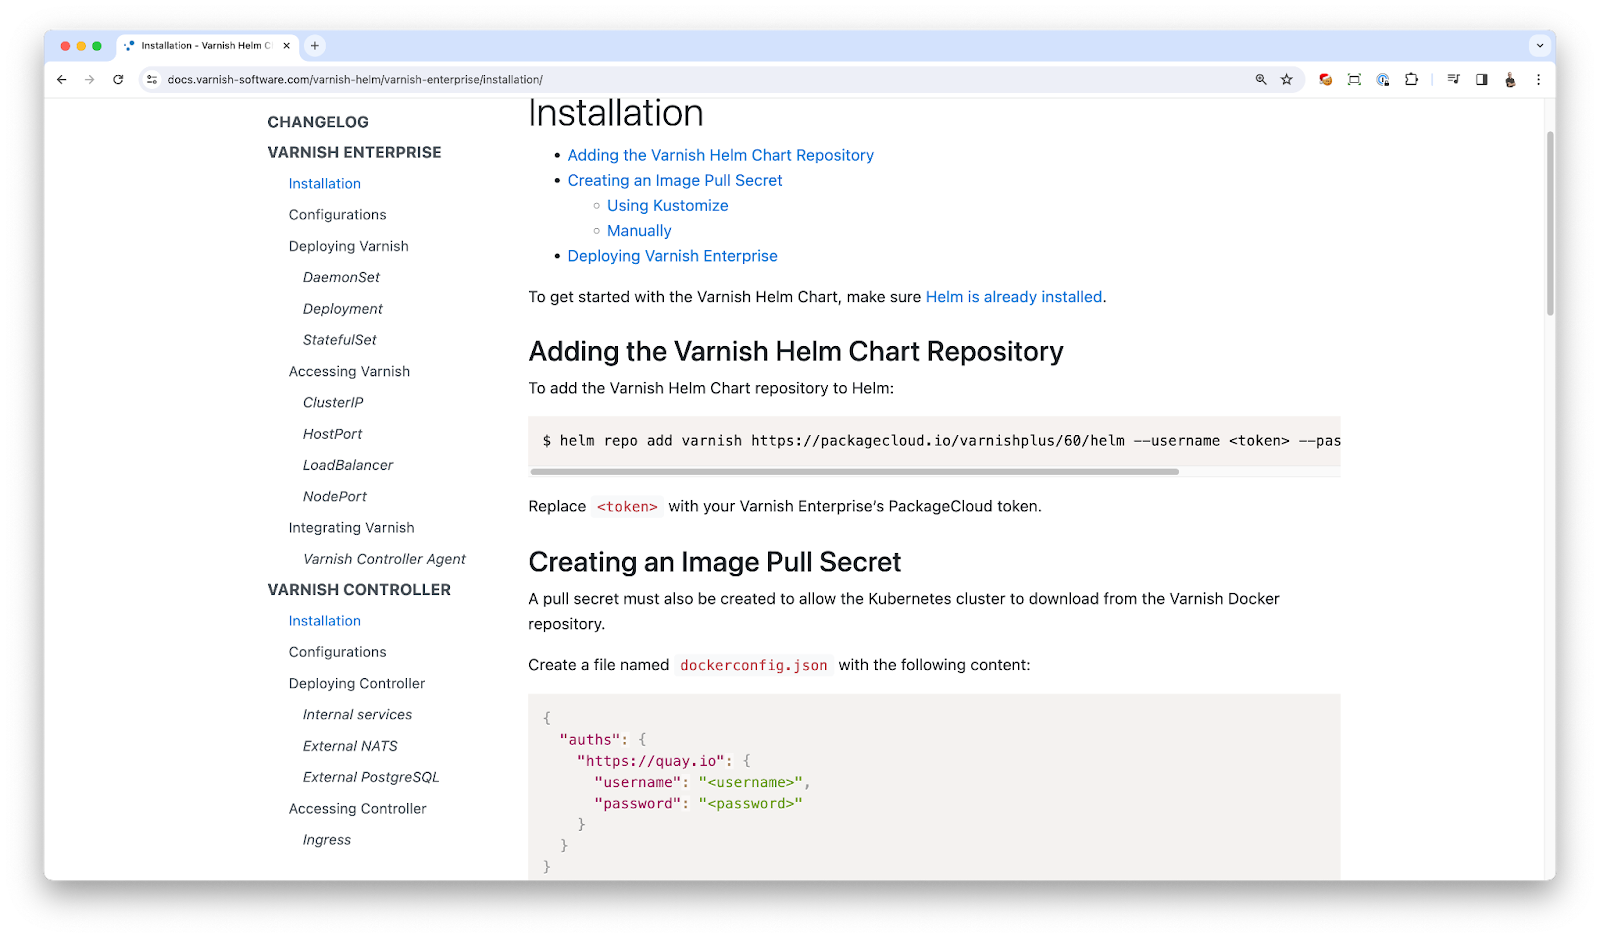
Once the credentials are in place and you create the so-called pull secret, you can start defining your values.yaml file.
Values.yaml configuration options
To access the private Helm and Docker repositories, we need to register the pull secret that I referred to in the previous section. In this example the secret is called varnish-pull-secret.
You register it in the global parameters, and then you can start configuring the specifics of the Varnish Enterprise install, as you can see in the example below:
global:
  imagePullSecrets:
    - name: varnish-pull-secret
server:
  kind: "Deployment"
  replicas: 1
  tls:
    enabled: true
  vclConfig: |
    vcl 4.1;
    backend default none;

    sub vcl_recv {
        return(synth(200));
    }
  service:
    https:
      enabled: true
We’re deploying this Varnish Enterprise setup as a regular Kubernetes deployment with a single replica. We’re enabling TLS, both at the Varnish level and at the Kubernetes service level. And finally we’re setting up our VCL file which determines the behavior of this caching instance.
In this case, we’re returning synthetic output. Here’s the VCL file that we’re deploying as part of the server.vclConfig inside the values.yaml file:
vcl 4.1;
backend default none;
sub vcl_recv {
   return(synth(200));
}
This VCL configuration doesn’t connect to a web server and only returns an HTTP 200 status in the standard synthetic template. Here’s what the output looks like:
<!DOCTYPE html>
<html>
 <head>
   <title>200 OK</title>
 </head>
 <body>
   <h1>Error 200 OK</h1>
   <p>OK</p>
   <h3>Guru Meditation:</h3>
   <p>XID: 32785</p>
   <hr>
   <p>Varnish cache server</p>
 </body>
</html>
Installing and running Varnish
Once your run the helm install command, as illustrated below, you’ll get some output containing the confirmation of the Helm release:
$ helm install -f values.yaml varnish-enterprise varnish/varnish-enterprise
NAME: varnish-enterprise
LAST DEPLOYED: Thu Dec  7 14:19:52 2023
NAMESPACE: default
STATUS: deployed
REVISION: 1
TEST SUITE: None
NOTES:
__     __               _     _
\ \   / /_ _ _ __ _ __ (_)___| |__
 \ \ / / _` | '__| '_ \| / __| '_ \
  \ V / (_| | |  | | | | \__ \ | | |
   \_/ \__,_|_|  |_| |_|_|___/_| |_|
 _____       _                       _
| ____|_ __ | |_ ___ _ __ _ __  _ __(_)___  ___
|  _| | '_ \| __/ _ \ '__| '_ \| '__| / __|/ _ \
| |___| | | | ||  __/ |  | |_) | |  | \__ \  __/
|_____|_| |_|\__\___|_|  | .__/|_|  |_|___/\___|
                         |_|
         www.varnish-software.com
You can then run the kubectl get all command to see what was created on that Kubernetes cluster thanks to the Helm chart. Here’s what that could look like:
$ kubectl get all
NAME                                      READY   STATUS    RESTARTS
pod/varnish-enterprise-8497c8bc97-v4wfp   2/2     Running   0
NAME                         TYPE        CLUSTER-IP     EXTERNAL-IP   PORT(S)
service/varnish-enterprise   NodePort    10.99.163.64   <none>        80:31901/TCP,443:32012/TCP
NAME                                 READY   UP-TO-DATE   AVAILABLE
deployment.apps/varnish-enterprise   1/1     1            1
NAME                                            DESIRED   CURRENT   READY
replicaset.apps/varnish-enterprise-8497c8bc97   1         1         1
The command lists the following resources that were created:
- A pod that contains the containers
- A service that exposes the ports of the container endpoints to the host system using port forwarding
- A replica set that is able to scale the setup if an increase of capacity is required
The service exposes the HTTP and HTTPS ports of the Varnish Enterprise container and maps them to random ports that are forwarded to the host system. In this case I can access Varnish over HTTP on local port 31901 and over HTTPS on local port 32012.
Connecting Varnish to a web server
Returning generic synthetic output isn’t the best use of Varnish. The reason you would use it is to cache the output of another pod in the cluster.
In the video I used the echo-server as a dummy service to accelerate. Regardless of the service you’re trying to accelerate, you’ll need to know its hostname or IP and which port to access the service on.
Kubernetes exposes service hosts and ports through a set of environment variables. The environment variables below show the IP address and port of that echo-server we deployed as a dummy service:
ECHO_SERVER_SERVICE_HOST=10.106.183.170
ECHO_SERVER_SERVICE_PORT=80
And while we can use these environment variables or hardcode their corresponding values into the VCL file, I prefer using the internal DNS name that Kubernetes creates for each service.
The values.yaml file reflects this:
global:
  imagePullSecrets:
    - name: varnish-pull-secret
server:
  kind: "Deployment"
  replicas: 1
  tls:
    enabled: true
  vclConfig: |
    vcl 4.1;
    backend default {
      .host = "echo-server.default.svc.cluster.local";
    }
  service:
    https:
      enabled: true
This internal DNS name is formatted as <service name>.<namespace>.svc.cluster.local and echo-server.default.svc.cluster.local is the one of our dummy service.
After updating the values.yaml file, we need to re-deploy these changes, using the following command:
helm upgrade -f values.yaml varnish-enterprise
varnish/varnish-enterprise
And when we connect to http://localhost:31901 or https://localhost:32012 again, we will retrieve and cache the output from the dummy service in order to accelerate it.
Barely scratching the surface
In this blog post and the corresponding video, we’re barely scratching the surface. This is just the tip of the iceberg and there’s so much more to cover.
There are dozens of configuration parameters to tune: service parameters, Varnish runtime parameters, storage settings, health checking, logging and much more.
The Varnish Enterprise pod that is deployed to Kubernetes doesn’t just contain the caching container. There’s even a separate “sidecar” container that returns NCSA-style web server logging, allowing you to know what requests your Varnish Enterprise setup receives.
To be perfectly honest, there is more than one Helm Chart for Varnish Enterprise. The Varnish Controller, which is our control plane, can also be deployed in Kubernetes using Helm.
If you want to learn more about the deployment and configuration of Varnish Enterprise using Helm, go to the docs page.
Want to try the Helm Charts yourself?
If you’re interested in taking it for a spin yourself, you can contact us.
Remember: this is an enterprise product that requires a Varnish Enterprise license.
If you’re an existing client, please reach out to your account manager, who will be happy to assist you.
If you’re not a client yet, go to the contact page on our website, fill in the form and one of our colleagues will get in touch with you.
What about Open Source?
While Varnish Enterprise is a premium web acceleration and content delivery solution, there are still millions of websites out there that use Varnish Cache, the open source version of Varnish.
And while I cannot confirm anything officially, we are looking at creating a free and open source version of this Helm Chart. Details, timelines and an official commitment are still to be decided on.
However, if we ever decide to create an official Varnish Cache Helm Chart, it obviously won’t have the same capabilities as the Varnish Enterprise Helm Chart, because these are two different products.


