
Have you been trying to figure out how you can easily use Varnish Controller with docker-compose? This article walks you through the process step by step.
Background
Prerequisites
- Docker installed
- Docker Compose installed
- Varnish Controller license file in the same directory as docker-compose.yml as license.lic
- Logged in to Varnish Software Docker registry docker login -u="varnish-software+<NAME>" -p="<PW-TOKEN>" quay.io
Creating the docker-compose.yml
In this post, we are going to create a docker-compose.yml that will start the Varnish Controller and have a Varnish server register to the system and be ready to receive configuration. No need to copy and paste; you will find a complete docker-compose.yml at the bottom.
Let’s explain the setup in steps.
version: "3"

networks:
  default:
    driver: bridge
  no-internet:
    driver: bridge
    internal: true
We define two simple networks that we are going to use.
- default is used for services that need to be accessible from the outside.
- no-internet is an internal network with no access to the outside world. We use this for internal communications.
As shown below, we start by defining a Varnish server with a controller agent running as a sidecar (sharing three directories). You can also use your own custom image based on the varnish-plus image to add extra software or to update with latest OS updates.
See comments inline within the yaml for a more detailed description.
services:
# This is our Varnish Container; it will handle all requests and be configured
# by the Varnish Controller.
  varnish:
    image: "quay.io/varnish-software/varnish-plus:latest"
    restart: always
    environment:
      # We want Varnish to listen to every IP in the container
      - VARNISH_ADMIN_LISTEN_ADDRESS=0.0.0.0
      # We only want to use 10% of available memory when testing
      - MSE_MEMORY_TARGET=10%
    volumes:
      # These volumes are used so that the Controller Agent and Varnish can share
      # files and configuration. VSM (Varnish Shared Memory) is for the agent to
      # be able to access Varnish counters. tmp is used for the agent to write VCL
      # files and load them into Varnish, and last secret for sharing the varnishadm
      # secret.
      - varnish_vsm:/var/lib/varnish
      - varnish_tmp:/controller
      - varnish_secret:/etc/varnish
    ports:
      - "8088:6081"
    networks:
      # We allow Varnish to access the default network with internet access.
      - default

# This is our Varnish Controller Agent container, it runs as a sidecar to Varnish.
  agent:
    image: "quay.io/varnish-software/varnish-controller-agent:latest"
    restart: always
    volumes:
      # Volumes shared with Varnish container.
      - varnish_vsm:/var/lib/varnish
      - varnish_tmp:/controller
      - varnish_secret:/etc/varnish
    environment:
      # Varnish Controller Configuration
      # The name as the agent identifies as. This varnish server will show up in
      # the dashboard with this name
      VARNISH_CONTROLLER_AGENT_NAME: "varnish"
      # We connect to varnish on its internal port, we could also use the
      # exposed port if needed.
      VARNISH_CONTROLLER_VARNISH_HOST: "varnish:8088"
      # Used to find the Varnish VSM directory (usually same as hostname
      # on Varnish container)
      VARNISH_CONTROLLER_VARNISH_NAME: "varnish"
      # The tags with which we want to tag this varnish server as it registers
      # to the controller.
      # you can add dynamic tags in the cli/ui/api
      VARNISH_CONTROLLER_TAGS: "varnish,container,eu,frankfurt"
      # This host is used to send invalidation requests to; we use the exposed port.
      VARNISH_CONTROLLER_VARNISH_INVALIDATION_HOST: "varnish:8088"
      VARNISH_CONTROLLER_BASE_URL: "https://varnish:8088"
      # NATS server that ties everything together.
      VARNISH_CONTROLLER_NATS_SERVER: "nats:4222"
      # This is where the Agent will save its files, needs to be shared
      # with the same path with Varnish container.
      VARNISH_CONTROLLER_BASE_DIR: "/controller"
    # We need to connect to NATS, and no need to connect to the internet.
    networks:
      - no-internet
Next up, we configure Postgres, which keeps our state and also NATS, which is the connective technology used for messaging in the Varnish Controller. It is responsible for addressing, discovery and exchanging of messages and is used by most of the components.
postgres:
    image: "postgres:alpine"
    restart: always
    tmpfs:
    # Note, Storage is placed on a tmpfs so every restart will come up fresh
      - /var/lib/postgresql/data
    expose:
      - "5432"
    environment:
      # Set the username and password (and the database name) for postgres
      # we use this for brainz later.
      POSTGRES_USER: "varnish-controller"
      POSTGRES_PASSWORD: "Joe9Eev1cheeX6ree3deigh0shailai8"
    networks:
      # No need to have a connection to the internet
      # brainz is the only service that needs to have access.
      - no-internet

  nats:
    image: "quay.io/varnish-software/varnish-controller-nats:latest"
    restart: always
    # For this simple demo we skip creating a config file to handle larger
    # message payloads/tls/authentication for simplicity, but it is always
    # recommended in a production setup.
    command:
      - "-D"
      - "-p"
      - "4222"
    expose:
      - "4222"
    networks:
      # No need to be connected to the internet.
      - no-internet
Now we have:
- varnish running with a sidecar in the form of a Controller agent.
- Shares:
- /var/lib/varnish for accesss to Varnish Shared Memory
- /controller for sharing VCL files from agent to varnish
- /etc/varnish for sharing a secret for varnishadm
- postgres for saving state and saving configuration
- nats for connecting everything together.
So we continue with the rest of the Varnish Controller:
 brainz:
   image: "quay.io/varnish-software/varnish-controller-brainz:latest"
   restart: always
   environment:
     # We create the initial user, which will be the "sysadmin" of the
     # system. You can use this user to create new users and orgs.
     VARNISH_CONTROLLER_SYSTEM_ADMIN_USER: "admin"
     VARNISH_CONTROLLER_SYSTEM_ADMIN_PASS: "admin"
     # Database settings
     VARNISH_CONTROLLER_DB_NAME: "varnish-controller"
     VARNISH_CONTROLLER_DB_USER: "varnish-controller"
     VARNISH_CONTROLLER_DB_PASS: "Joe9Eev1cheeX6ree3deigh0shailai8"
     VARNISH_CONTROLLER_DB_SERVER: "postgres"
     VARNISH_CONTROLLER_NATS_SERVER: "nats:4222"
   # This is needed to create the admin user; it will be skipped if
   # it already exists.
   command: "-mod-admin-user"
   volumes:
     # We need to supply a license file to the brainz process.
     - ./license.lic:/var/lib/varnish-controller/varnish-controller-brainz/license.lic
   networks:
     # No need to connect to anything other than NATS and Postgres.
     - no-internet

 apigw:
   image: "quay.io/varnish-software/varnish-controller-api-gw:latest"
   restart: always
   environment:
     VARNISH_CONTROLLER_NATS_SERVER: "nats:4222"
   expose:
     - "8002"
   networks:
     # We need to connect to NATS, and we need to receive API requests
     # so we join both networks.
     - no-internet
     - default

 ui:
   image: "quay.io/varnish-software/varnish-controller-ui:latest"
   restart: always
   environment:
     VARNISH_UI_SERVER_API_HOSTS: "http://apigw:8002"
     VARNISH_UI_SERVER_CSP: "false"
     VARNISH_UI_SERVER_CORS_ALLOWED_ORIGINS: "*"
   ports:
     - "8080:8080"
   networks:
     - default
     - no-internet

 # We add an Apache service to serve as a backend.
 httpd:
   image: "httpd:latest"
   hostname: origin
   restart: always
   networks:
     - no-internet
As shown, there are several parts of the Varnish Controller; each process can be run many times, this includes the brainz process, as long as we share the same database. In this example, we run just one of each component for simplicity.
For simplicity here is the full docker-compose.yml file:
---
version: "3"

services:
  postgres:
    image: "postgres:alpine"
    restart: unless-stopped
    tmpfs:
      - /var/lib/postgresql/data
    environment:
      POSTGRES_USER: "varnish-controller"
      POSTGRES_PASSWORD: "Joe9Eev1cheeX6ree3deigh0shailai8"
    networks:
      - no-internet

  nats:
    image: "quay.io/varnish-software/varnish-controller-nats:latest"
    restart: unless-stopped
    command:
      - "-D"
      - "-p"
      - "4222"
    expose:
      - "4222"
    networks:
      - no-internet

  apigw:
    image: "quay.io/varnish-software/varnish-controller-api-gw:latest"
    restart: unless-stopped
    environment:
      VARNISH_CONTROLLER_NATS_SERVER: "nats:4222"
    expose:
      - "8002"
    networks:
      - no-internet
      - default

  ui:
    image: "quay.io/varnish-software/varnish-controller-ui:latest"
    restart: unless-stopped
    environment:
      VARNISH_UI_SERVER_API_HOSTS: "http://apigw:8002"
      VARNISH_UI_SERVER_CSP: "false"
      VARNISH_UI_SERVER_CORS_ALLOWED_ORIGINS: "*"
    ports:
      - "8080:8080"
    networks:
      - default
      - no-internet

  brainz:
    image: "quay.io/varnish-software/varnish-controller-brainz:latest"
    restart: unless-stopped
    environment:
      VARNISH_CONTROLLER_SYSTEM_ADMIN_USER: "admin"
      VARNISH_CONTROLLER_SYSTEM_ADMIN_PASS: "admin"
      VARNISH_CONTROLLER_DB_NAME: "varnish-controller"
      VARNISH_CONTROLLER_DB_USER: "varnish-controller"
      VARNISH_CONTROLLER_DB_PASS: "Joe9Eev1cheeX6ree3deigh0shailai8"
      VARNISH_CONTROLLER_DB_SERVER: "postgres"
      VARNISH_CONTROLLER_NATS_SERVER: "nats:4222"
    command: "-mod-admin-user"
    volumes:
      - ./license.lic:/var/lib/varnish-controller/varnish-controller-brainz/license.lic
    networks:
      - no-internet

  varnish:
    image: "quay.io/varnish-software/varnish-plus:latest"
    hostname: varnish
    restart: unless-stopped
    environment:
      - VARNISH_ADMIN_LISTEN_ADDRESS=0.0.0.0
      - MSE_MEMORY_TARGET=10%
    volumes:
      - varnish_vsm:/var/lib/varnish
      - varnish_tmp:/controller
      - varnish_secret:/etc/varnish
    ports:
      - "8088:6081"
    networks:
      - no-internet
      - default

  agent:
    image: "quay.io/varnish-software/varnish-controller-agent:latest"
    restart: unless-stopped
    volumes:
      - varnish_vsm:/var/lib/varnish
      - varnish_tmp:/controller
      - varnish_secret:/etc/varnish
    environment:
      VARNISH_CONTROLLER_AGENT_NAME: "varnish"
      VARNISH_CONTROLLER_VARNISH_HOST: "varnish:6081"
      VARNISH_CONTROLLER_VARNISH_NAME: "varnish"
      VARNISH_CONTROLLER_TAGS: "varnish,container,eu,frankfurt"
      VARNISH_CONTROLLER_VARNISH_INVALIDATION_HOST: "varnish"
      VARNISH_CONTROLLER_BASE_URL: "https://varnish:8088"
      VARNISH_CONTROLLER_BASE_DIR: "/controller"
      VARNISH_CONTROLLER_NATS_SERVER: "nats:4222"
    networks:
      - no-internet

  httpd:
    image: "httpd:latest"
    hostname: httpd
    restart: unless-stopped
    networks:
      - no-internet

volumes:
  varnish_vsm:
    driver_opts:
      type: tmpfs
      device: tmpfs
  varnish_tmp:
    driver_opts:
      type: tmpfs
      device: tmpfs
  varnish_secret:

networks:
  default:
    driver: bridge
  no-internet:
    driver: bridge
    internal: true
Now we can start our containers with the command below. Remember to be in the same path with docker-compose.yaml while starting containers.
$ docker-compose -p demo up
(The docker-compose up command is a shorthand form of docker-compose build and docker-compose run.)
Creating network "demo_no-internet" with driver "bridge"
Creating network "demo_default" with driver "bridge"
Creating volume "demo_varnish_vsm" with default driver
Creating volume "demo_varnish_tmp" with default driver
Creating volume "demo_varnish_secret" with default driver
Creating demo_nats_1 ... done
Creating demo_brainz_1 ... done
Creating demo_apigw_1 ... done
Creating demo_ui_1 ... done
Creating demo_postgres_1 ... done
Creating demo_agent_1 ... done
Creating demo_varnish_1 ... done
Attaching to demo_agent_1, demo_brainz_1, demo_nats_1, demo_postgres_1, demo_ui_1, demo_varnish_1, demo_apigw_1
[---Output omitted---]
When complete, we should have all the containers deployed.
$ docker-compose -p demo ps
Name Command State Ports
---------------------------------------------------------------------------------------------------
demo_agent_1 /usr/bin/varnish-controlle ... Up
demo_apigw_1 /usr/bin/varnish-controlle ... Up 8002/tcp
demo_brainz_1 /usr/bin/varnish-controlle ... Up
demo_nats_1 /usr/bin/nats-server -D -p ... Up
demo_postgres_1 docker-entrypoint.sh postgres Up
demo_ui_1 /usr/bin/varnish-controller-ui Up 0.0.0.0:8080->8080/tcp,:::8080->8080/tcp
demo_varnish_1 /entrypoint.sh Up 0.0.0.0:8088->6081/tcp,:::8088->6081/tcp
We have two services that we can access directly:
- Varnish listens to port 8088
- Varnish Controller Dashboard on port 8080
We can check our applications: navigate to the Varnish Controller dashboard http://localhost:8080, and Varnish with a default configuration on http://localhost:8080.
Varnish Controller Dashboard
Let’s deploy some configuration. Log in to the Varnish Controller here: http://localhost:8080/ You should be greeted with the login page. Fill out username and password with admin and press Login
Click on: Configurations->VCLGroups->Create VCLGroup
- VCLGroup name: demo
- VCLGroup deployment type: Dedicated server with Root VCL
- Tags: varnish
- Deploy range: 1, 1
- Main VCL->Options->Create New VCL
- Paste below VCL, Save Draft
- Change VARNISH_CONTROLLER_AGENT_IP_HERE with the output from: docker inspect -f '' demo_agent_1
vcl 4.1;

backend default {
  .host = "httpd";
  .port = "80";
}

acl purge {
  "localhost";
  "VARNISH_CONTROLLER_AGENT_IP_HERE"/32;
}

sub vcl_recv {
  if (req.url == "/varnish-ping") {
    return(synth(200, "Hello, world!"));
  }
  if (req.method == "PURGE") {
    if (client.ip !~ purge) {
      return (synth(401, "Unauthorized"));
    }
    return (purge);
  }
}
- Create and Deploy -> Create & Deploy
Now we can test our deployed VCL.
Varnish using httpd as backend: http://localhost:8088

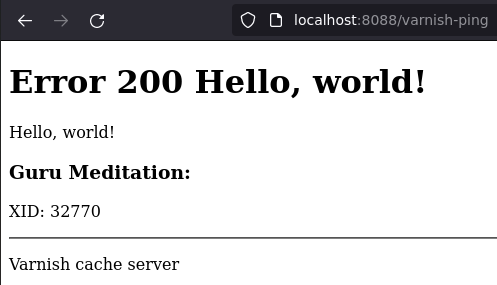
Varnish synthetic response with Hello world!: http://localhost:8088/varnish-ping
Varnish Controller CLI
We can use the Varnish Controller CLI to inspect and make changes from the console.
$ docker run -it --rm --network=demo_default --entrypoint=/bin/bash quay.io/varnish-software/varnish-controller-cli:latest
# We use flags and a trick to login
# you can set  VARNISH_CONTROLLER_CLI_* env variables instead.
$ vcli login http://apigw:8002/ -u admin --passwordfile <(echo admin)
Configuration saved to: /home/varnish/.vcli.yml
Login successful.
$ vcli agent ls
+----+---------+---------+--------------+--------------+-----------------+--------------------------------+
| ID |  Name   |  State  | Varnish Host | Varnish Port | Varnish Version |              Tags              |
+----+---------+---------+--------------+--------------+-----------------+--------------------------------+
|  1 | varnish | Running | varnish      |         6081 | plus-6.0.9r7    | (1)varnish (2)container (3)eu  |
|    |         |         |              |              |                 | (4)frankfurt                   |
+----+---------+---------+--------------+--------------+-----------------+--------------------------------+
$ vcli vclgroup ls
+----+------------+------+------+----------+---------------+-------------+----------+---------+---------------------+-------------+----------------+----------+
| ID | Staging ID | Name | Root | Deployed | Compile State |   MainVCL   | Includes | Domains |     Deployments     | RoutingRule |  Organization  | Creator  |
+----+------------+------+------+----------+---------------+-------------+----------+---------+---------------------+-------------+----------------+----------+
|  1 |            | demo | true | true     | Successful    | (1)demo.vcl | [empty]  |         | (1)demo_dc [Active] |             | [System Admin] | admin(1) |
+----+------------+------+------+----------+---------------+-------------+----------+---------+---------------------+-------------+----------------+----------+
$ vcli vcl ls
+----+----------+---------+---------------------------+------------------------------------------------------------------+-------+----------------+----------+
| ID |   Name   |  State  |          Content          |                               SHA                                | Label |  Organization  | Creator  |
+----+----------+---------+---------------------------+------------------------------------------------------------------+-------+----------------+----------+
|  1 | demo.vcl | Applied | text/plain; charset=utf-8 | a31eb1ea897d4aa1900066fbad5d8c6b9d6098858be0988d00c9ed2eb56ceff4 |       | [System Admin] | admin(1) |
+----+----------+---------+---------------------------+------------------------------------------------------------------+-------+----------------+----------+
$ vcli vcl download 1
vcl 4.1;

backend default {
  .host = "httpd";
  .port = "80";
}

acl purge {
  "localhost";
  "172.25.0.3"/32;
}

sub vcl_recv {
  if (req.url == "/varnish-ping") {
    return(synth(200, "Hello, world!"));
  }
  if (req.method == "PURGE") {
    if (client.ip !~ purge) {
      return (synth(401, "Unauthorized"));
    }
    return (purge);
  }
}
$ vcli vcls update 1 --name main2.vcl --file /tmp/main2.vcl
+----+---------------+---------+---------------------------+------------------------------------------------------------------+-------+----------------+----------+
| ID |     Name      |  State  |          Content          |                               SHA                                | Label |  Organization  | Creator  |
+----+---------------+---------+---------------------------+------------------------------------------------------------------+-------+----------------+----------+
|  1 | demo.vcl      | Changed | text/plain; charset=utf-8 | a31eb1ea897d4aa1900066fbad5d8c6b9d6098858be0988d00c9ed2eb56ceff4 |       | [System Admin] | admin(1) |
|    | --- Draft --- |         |                           |                                                                  |       |                |          |
|    | main2.vcl     |         |                           |                                                                  |       |                |          |
+----+---------------+---------+---------------------------+------------------------------------------------------------------+-------+----------------+----------+
$ vcli vcls diff 1
--- /tmp/1863273786-source	2022-06-10 12:44:19.272444773 +0000
+++ /tmp/973205555-draft	2022-06-10 12:44:19.272444773 +0000
@@ -7,7 +7,7 @@

 acl purge {
   "localhost";
-  "172.25.0.3"/32;
+  "172.25.0.0"/24;
 }

 sub vcl_recv {
$ vcli vclgroup deploy 1
+----+------------+------+------+----------+---------------+---------------+----------+---------+---------------------+-------------+----------------+----------+
| ID | Staging ID | Name | Root | Deployed | Compile State |    MainVCL    | Includes | Domains |     Deployments     | RoutingRule |  Organization  | Creator  |
+----+------------+------+------+----------+---------------+---------------+----------+---------+---------------------+-------------+----------------+----------+
|  1 |            | demo | true | true     | Successful    | (1)demo.vcl   | [empty]  |         | (1)demo_dc [Active] |             | [System Admin] | admin(1) |
|    |            |      |      |          |               | --- Draft --- |          |         |                     |             |                |          |
|    |            |      |      |          |               | (1)demo.vcl   |          |         |                     |             |                |          |
+----+------------+------+------+----------+---------------+---------------+----------+---------+---------------------+-------------+----------------+----------+
Conclusion
This article aims to show how you can easily use Varnish Controller with docker-compose. It also shows how to set up and run Varnish with an agent sidecar. It should be fairly easy to adapt for kubernetes/openshift container runtimes.
If you would like to play around with an already configured system with several Varnish servers and with our traffic router you can read more about it here.


